Showing posts with label Tasty. Show all posts

Friday, March 7, 2014

Recipe: Tortellini Soup!

This recipe was something that was just being spread around Facebook, but looked so delicious. After I looked into it and saw that the recipe was SUPER simple I grabbed the ingredients and got it a cooking. And let me tell you, one of the best soups I have EVER had!!


Ingredients:

1 bag of frozen tortellini

 1 small bag of fresh spinach 

1 can of Italian style diced tomatoes 

1 box or 4 cups or chicken broth 

1 block of cream cheese 

1 lb. of roll sausage

 Salt and Pepper to taste


Directions:

Brown the sausage and put all ingredients in crock-pot, chunking up the cream cheese. Cook on low for 5-6 hrs.


Wednesday, September 25, 2013

Apple butter and pumpkin pancakes

So neither of these were huge undertakings so one shared blog of fall food goodness should subsisse!! The pumpkin pancakes were so easy probably cuz I did them lazy style by just adding pumpkin to the pancake batter only took a couple seconds!!! I was impressed I don't make pancakes after a few morning meltdowns I had given up. But these sounded so good i has to give it a go and they turned out THICK but not burnt so I'm making progress.

And Kyra loved them!


The apple butter,  just grabbed a simple recipe off of Pinterest and dove in. I have never made anything of this sort and although the pictures look like other apple butter pictures it seems odd to me. I guess cuz butter is like thick creamy and this isn't it really should just be simply called what it is, apple jam! Lol either way it tastes good! I refrigerated one and froze two, one I am gonna save for the holidays for Dustin to try!!

Apple butter however is a process to make.

Step 1: peel the apples. Why are peelers made so crappy? They are metal are hard to grip and don't do a good job has to be a simpler idea!! Maybe I just got a cheap one,  but it was all I could find at the px.


Step 2: Slice into quarters. This was like the easiest step for me!


Step 3: Cut out the core. Obviously if you have an apple slicer/ corer you are way ahead of the game and very smart my friend!


Step 4: Cube the rest of the apples, helps it cook faster. Than add 1/4 cup brown sugar, some cinnamon, some all-spice, and about 1/2 cup of water with the apples into the crock pot and let cook on low over night approximately 10 hours.


Step 5: Take a potato masher, and smash it down to mush land!!! Haha I guess you should proceed to cook it for a couple hours longer but I didn't....so mine is a bit more chunky than would be normal so mine is a mix between apple sauce and apple butter!  Also at this step you can stick it in the blender if you would like no chunks at all!!


Step 6: Can it, or in my case Tupperware it!! And store accordingly!! Or just eat it yummy!!


So my verdict on attempting them both for the first time???


AMAZING, MUST HAVE FALL TREATS, they will be made again next year!!

Tuesday, September 17, 2013

Apple Pumpkin Crisp!!

I was out walking my dog this evening and boy oh boy has it gotten chilly out there already. Granted I was only wearing jeans, flip flops, and a hoodie, so that could have calculated for some of it. When I packed away my summer clothes my flip flops probably should have went with them and probably will join them sometime tonight before bed.

With all that being said the heaters are turned on low, and the best way to warm a house is to bake!! And well we have tons of apples and I prepared for the season sell out of pumpkin pie filling weeks ago. So when I came across a recipe that used both I was SOLD!! Plus it kinda crosses two things on my list off at once pumpkin pie and apple crisp. But since it is more of a crisp I am going to just cross of apple crisp for this one!

Here is a quick List of what you need:

Ingredients
  • 2 cups APPLES, peeled and chopped
  • 3/4 cup FLOUR
  • 3/4 cup BROWN SUGAR
  • 1/4 cup BUTTER, softened
  • 3/4 teaspoon PUMPKIN PIE SPICE, divided
  • 1 cup PUMPKIN PUREE
  • 1/3 cup WHITE SUGAR
  • 1/4 cup MILK
  • 2 Tablespoons FLOUR
  • 1 EGG
And the Directions are so easy you could do it in your sleep!! Okay maybe not!

Instructions
Preheat oven to 350°.
Place apples in the bottom of a 9 inch pie plate. Microwave 2 1/2 – 4 minutes, until apples are crisp tender.
In a small bowl, mix together 3/4 cup flour, brown sugar, butter and 1/4 teaspoon pumpkin pie spice. Stir together until crumbly, set aside.
In a medium bowl, whisk together pumpkin, sugar, milk, 2 Tablespoons flour, 1/2 teaspoon pumpkin pie spice and egg. Pour over apples in pie plate. Sprinkle crisp topping mixture over pumpkin layer.
Bake 30-35 minutes or until golden brown and set. Let cool 30 minutes, serve with whipped cream or vanilla ice cream.
As I write this blog I am in the 30 mins cool stage which is TORTURE because it smells so amazing! The cooking 30 mins was nothing because I was working out so I could consume the calories this thing probably has in it!

Would look prettier in a pie pan as it was supposed to but I don't own one!

Wouldn't this be super yummy with ice cream on it?
Here are the yummy results...As I eat it I am wishing I had some Vanilla Ice Cream or Frozen Whipped Cream!!  Can't wait to feed Kyra some tomorrow I can bet she is gonna love it! I even resisted eating more than one even tho my taste buds were screaming at me!

Saturday, August 31, 2013

Fall Fun Series!!!


 Hey everyone just swinging by to say: IT'S FALL!! Yup tomorrow it's September and although the first official day of fall isn't until the 21st, I always count the whole month of September in the Fall months!!

And although Christmas is my favorite holiday, Fall is my favorite season!!! Last year I did the 25 days of Christmas Series and got great reviews and everyone loved it!! So this year I thought instead of trying to think up 25 new things for Christmas time, I would celebrate fall!!!

So in the next 3 months be prepared to see (almost) ALL THINGS FALL!! I am so excited to share my love of fall with you and my dear Kyra this year!! So be sure to stick around, because starting tomorrow the fun begins.

Side note: Kyra slept through the night, I think we may have survived the Jet Lag finally!!!

Monday, July 1, 2013

Yummy Pinterest finds!!!

So as one of my goals for the rest of the year was to try some new recipes...Well its only the 1st of July and I have already found 2 recipes that I wanted to put on my blog because they are THAT GOOD!  And really pretty healthy!! I didn't remember to take a picture of the first recipe as the girls and I were super excited to eat it!!


Chicken and Avocado Enchiladas in Creamy Avocado Sauce

Chicken and avocado enchiladas in a creamy and spicy avocado sauce.

Servings: makes 4 servings

Prep Time: 10 minutes
Cook Time: 20 minutes
Total Time: 30 minutes Printable Recipe
Ingredients
  • 1 cup chicken broth
  • 1 cup salsa verde
  • 1/2 cup sour cream (or Greek yogurt)
  • 2 avocados
  • 1 jalapeno, coarsely chopped (remove seeds for less heat)
  • 1 clove garlic
  • 1 teaspoon cumin, toasted and ground
  • salt and pepper to taste
  • 1 handful cilantro
  • 1/2 lime, juice
  • 4 cups cooked shredded chicken
  • 2 avocados, diced
  • 2 green onions, sliced
  • 2 cups cheddar cheese, shredded
  • 2 cups monterey jack cheese, shredded
  • 8 (7 inch) tortillas
Directions
  1. Puree the chicken broth, salsa verde, sour cream, avocados, jalapeno, garlic, cumin, salt and pepper, cilantro and lime juice in a blender or food processor.
  2. Mix the half of the sauce with the chicken, avocado, green onions and half of the cheese.
  3. Coat the bottom of a large baking dish with some of the sauce, wrap the chicken and avocado mixture in the tortillas and place them in the dish.
  4. Top the enchiladas with the remaining sauce and cheese and bake in a preheated 350F oven until the cheese has melted and the sides are bubbling, about 15-20 minutes.


Comments: The amount of time it took to prep was longer than 10 mins, that is very inaccurate as it does involve a lot of cutting. But it was so worth it. I did a double recipe and put 1 whole Jalapeno, and one with the seeds out and it was like the perfect amount of spicy!! I made 8 for the 4 of us, and 2 kids. And we all only had one each, the avocado and chicken is very filling.


The other recipe was something I made for Kyra and I for dinner tonight. It was amazing, and very simple to make!! If you saw the pictures of both recipes you would laugh I guess I was feeling green, both are very green meals. I was also lucky that a good friend of mine brought me fresh lettuce from her garden!!!


Baked Chicken Stuffed with Pesto and Cheese (Updated Version)


Ingredients:
2 large boneless, skinless chicken breasts
2 T Basil Pesto with Lemon or your favorite commercial pesto
2 T low-fat sour cream
2 T grated mozzarella cheese
(I used heaping tablespoons of pesto, sour cream and cheese)
2 eggs, beaten (or if they're large eggs one will probably be enough)
3 T finely grated Parmesan cheese
3 T almond flour (or almond meal, but almond flour is better for this because it's more finely ground)
black pepper to taste

Instructions:
Preheat oven to 375F/190C. Spray a small casserole dish with non-stick spray. Trim any visible fat from chicken breasts, then put them one at a time inside a heavy plastic bag and pound with meat mallet until the chicken is as thin as you can get it. Don't worry too much about the shape or whether there are some loose pieces, you can tuck them in when you roll up the chicken.

In a small bowl mix together the basil pesto, sour cream, and grated mozzarella. Use a rubber scraper to spread a thin layer of this mixture over each chicken breast, stopping about 1/2 inch from the edge of the chicken (so it doesn't run out so much as it cooks.) Roll up the chicken breasts and secure them with a couple of toothpicks. (I roll them so the finished piece is as thin as I can get it so they will cook quickly.)

Prepare two bowls, one with the beaten egg and the other with the grated Parmesan-almond flour mixture, seasoned with black pepper to taste. Dip each chicken breast roll first into the egg mixture and then into the Parmesan-almond flour mixture, patting it on so the chicken breast roll is well-coated with the mixture.

Put chicken breasts into the casserole dish and bake until the chicken is firm and lightly browned. (Start checking after about 25-30 minutes; total baking time will be 30-35 minutes.) Serve hot.

Comments: I made the pesto with the pesto packet from the seasoning section at the grocery store, mixed with sour cream and water until it was all mixed in and smooth! Than I added a handful of the cheese. It worked out well, and Im saving the left over sauce for a toasted turkey wrap later this week.

Monday, April 1, 2013

Last days of Family visit

     Ok I suppose I better get around to finishing off the blog series about my families visit!! I'm sure they would love to have it all in one place to look back on.

    Where we last left off was from a fun night in downtown Amsterdam. And I'll tell you it sure was a good time. But morning came fast and we back on the road. The longest trip of all (according to google maps) so we left early so we wouldn't be getting home too late. We booked it out of town and were at least 45 mins down the road before we stopped for breakfast. And it was only at a truck stop and we were back on the road.

     But somehow the trip seemed to be flying by and litterally before we knew it we were crossing the border back into Germany. And right back into snow, figures. But seeing as it was only about 11 and Koln was only about an hour down the road we decided since Shane had never seen the huge cathedral in Koln we were gonna stop and have lunch and take a look. I think we finally impressed him with this one as far as churches are concerned. It is definatly one of my favorite.


    After making our way around it, we headed into the shopping district just to realize that....it was Good Friday. And NOTHING was open, that is except Subway, so Dustin's hopes to have subway were granted.

    On the way back to the car we walked over the Rhine River across the bridge with the locks of love and my dad made sure to take pictures of all the cool original locks! And after this stop we still made it back to post in time to get the mail and settle back in at home before getting something for dinner.


    All worn out and glad to be back, we rolled into bed so we could get up the next morning and enjoy their last day in Germany!!


    We got up late and dillydallied around before heading downtown to do some last min shopping, and grab lunch. We went to the same little restaurant Dustin and I first went to when we moved here and got some pretty good pizza, and pasta for Kyra. After a big lunch Kyra passed out in the car, we took the opportunity to go for a drive up to the Russian Cathedral as it was the last thing to see in Weisbaden and they couldn't leave without having at least done all the tourist things here in town.


    To celebrate their last night we looked up a nice German restaurant that none of us had ever been to and found our way there...after getting a bit lost, and having a nice conversation in all German to get directions. The food was really good, and the environment was so friendly, Dustin still says Brauhaus is better, but I will certainly suggest eating there when people wanna get dinner!! It was called Zum Hirsch.


All and all I would like to say a big thank you to both my dad and brother for the great 2 weeks of fun. It was so great seeing parts of Europe none of us had ever seen together. And we will have so many memories that can never be replaced. Maybe you can come back and visit again before we leave and we can see the UK or go south to Italy!! We will miss you around here.


Friday, March 15, 2013

White Girl Fajitas

     Per request I am posting my recipe. These are my fajita's they are white girl fajita's because I am white and I have no idea how to cook Mexican food but this is my compromise and they have received good comments!!

1 Bag of Frozen presliced and precooked chicken or steak
1 Bag of precut frozen bell peppers and onions
1 jar of Salsa as spicy or mild as you choose
1 tsp of Cummin
2 tsp of Paprika
2 tsp of garlic salt
pepper to taste

Add all ingredients in a pan and cook on medium high until they are all hot. Serve in tortilla's with cheese and sour cream.

So easy to make and takes only about 15 mins to cook. Could be done fresh and probably with better results too!!

Thursday, January 31, 2013

Project 52: Drink Up

     I took on this photography challenge as a way to get to know my camera. And I can say after only 3 weeks I am certainly learning A LOT. I have pulled out the manual learned the terms and am starting to put together how each factors in to how the other works. Now I really have got to get out and find better things to take pictures of. I had some great ideas for this but with a slightly rushed (NOT wanting to get further behind) manner; I had hubby bear make me some of his awesome, yet slightly messy looking Cocoa.

    This is my favorite drink of the winter time. I love it with a shot of Baileys and makes me feel all warm inside.


        I have learned how to take pictures in low light with out flash. By using my aperture and ISO. And now have learned when I have good lighting if I want my pictures to be clear not grainy I have to adjust my ISO back again. That was where I was faltering.

For complete list of all pictures from my Project 52 follow this link to Resolutions which has links to all of my project 52 blogs.

Saturday, December 22, 2012

Sweet and Salty

    We are narrowing down the 25 days of Christmas. Really happy to say that it feels like it has been a very successful month for my blog. I thank you all for following along and hope I have gained a few regular followers for the future of my blog.

     Seeing as there is only 3 days until Christmas it is time to start BAKING!!! I love to bake and more than anything LOVE to munch on all the junk. Way to become obese in the last couple weeks of the year! But if we didn't do this who would want to make their goal for the new year to be to loose weight?

     Well yesterday we had the final give away and sadly like they all have kind of been no one seemed interested except a select few. Which is sad because I thought maybe I would continue to do crafts and give them away but may not.

     The winner as there was only one entry again was Micah Howell....her letter to Santa was absolutely adorable!! And I know she will get everything she wants for Christmas from the old man. Now to find out what is going to be filling up that adorable little snow man!

It looks like Rudolf!!!
    I hadn't made these amazing little treats in a couple years but they are always a hit! Pretzel melts!! They are pretzels with Hershey Kisses and Peanut butter M&M's! Very easy to make also.


Pretzel Melts

Ingredients:
Bag of Pretzels
Bag of M&M's
2 bags of Hershey's Kisses

Preheat oven to 170*
On a cookie sheet lay out a layer of Pretzels

Place a Hershey Kiss on each Pretzel

Place in oven for 4-6 mins I find going the full 6 is best but keep an eye out you don't want them to completely melt you want them to stay in their normal shape but be soft. Than the next step you have to be quick about.

Push the M&M's down into the kiss


Put on cooling racks in the fridge
 Now ENJOY!!!


Monday, December 17, 2012

Little Slice of Heaven

     Well one of my favorite things to do is make up recipes as I go...I had been making this one up in my head for about 2 weeks now just trying to perfect how it was gonna go. Lets just say if your my neighbor and are friendly with me you are gonna be showered in amazing food every once in a while! Not to say that my recipes don't go a bit haywire sometimes, but last night that was NOT the case.

      I made a delicious pie creation. It has no name at this time maybe one of you can come up with something for me to call it.


Yummy Pie

Ingredients:
1 Oreo Pie crust
1 container of whipped cream cheese(regular can be used but it probably will take a lot more stiring to get the fluffy texture.)
Peanut butter
Sugar
Box of Chocolate pudding
1 Banana

In a bowl mix together 3 big spoonfuls of the cream cheese, 2 big spoonfuls of peanut-butter until well blended. I did this by hand but It could probably be done in a blender or food processor if you wanted. Than I slowly added sugar until the mixture became sweet. For me it was about 1/4-1/3 of a cup of sugar, but just keep tasting until you like the flavor of it. Than carefully spread this along the bottom of the pie crust. I wasn't careful and this made it crack which made it ugly to serve. Next mix the pudding packet according to the package. If it has directions for making a pudding pie use those as you want it to end up a bit more solid.  Than pour the pudding on top. Last slice the banana into thin slices and arrange them on top. Put in the fridge to cool for at least 30 mins to let it set up a bit.


I hope you guys enjoy this recipe and try it out for Christmas Dinner, or frankly for any dinner...haha you could even eat it as dinner. Not to say that would be the healthiest choice LOL!
 

Saturday, December 15, 2012

My dream home

      Oh to be surrounded by sweets all day everyday, doesn't that just sound DELICIOUS?  I would be in Heaven! I have such a terrible sweet tooth, but it makes me happy. Just equals a lot more days to the gym.

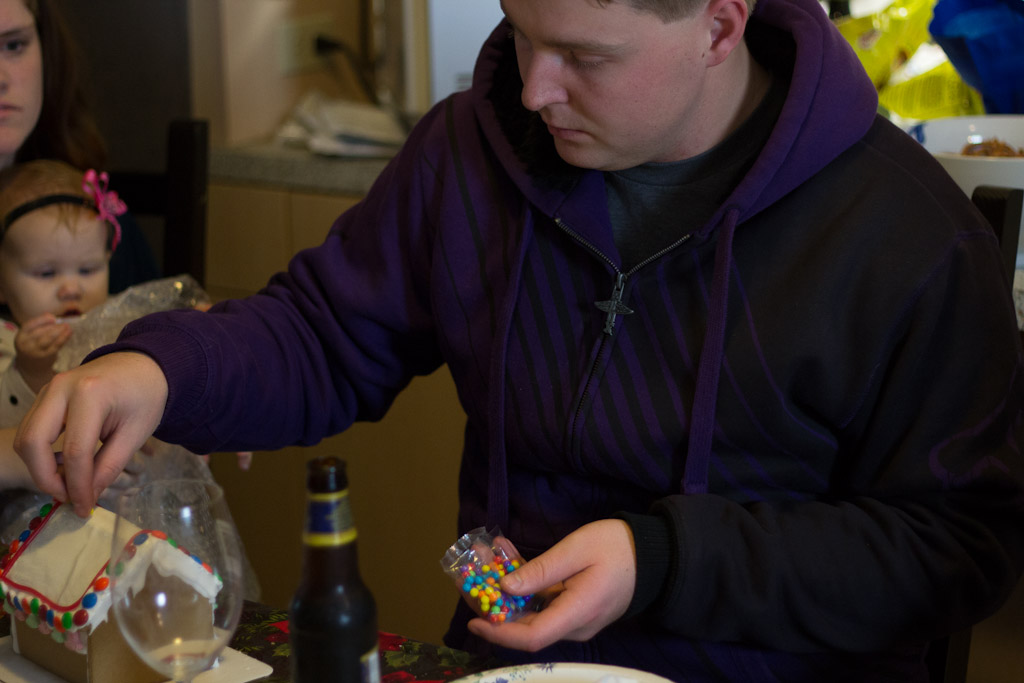
     Last night we were invited to a Gingerbread house making party!! This was our first time to one of these. And it was SO much fun. It was great to get a chance to talk to all my girl friends, and than to be able to munch on all the yummy candy as we built them!

     Dustin did most of the construction as I held on to Kyra and helped with input!!! We kept it pretty simple! But it totally turned out adorable if I do say so myself. The pictures were taken by Ashley Berry, our favorite photographer ever. And you should all go look at her pictures on http://photographybyashley.smugmug.com there are pictures of Kyra on there :) Also you can look at more of her pictures if you go to her Facebook page here!!!


Have any of you ever built Gingerbread homes? What is the coolest decoration for Ginger bread homes? I was pretty impressed by a few....Like puppy chow shingles, gum drop beer bottles, Ritz doors, and added on Chimneys!!!